4. Sales and accounts receivable
The Sales menu contains the complete customer cycle: the contact directory, the product and service catalogue, invoices, credit notes, customer receipts and receivables reporting.
4.1 Contacts (customers and suppliers)
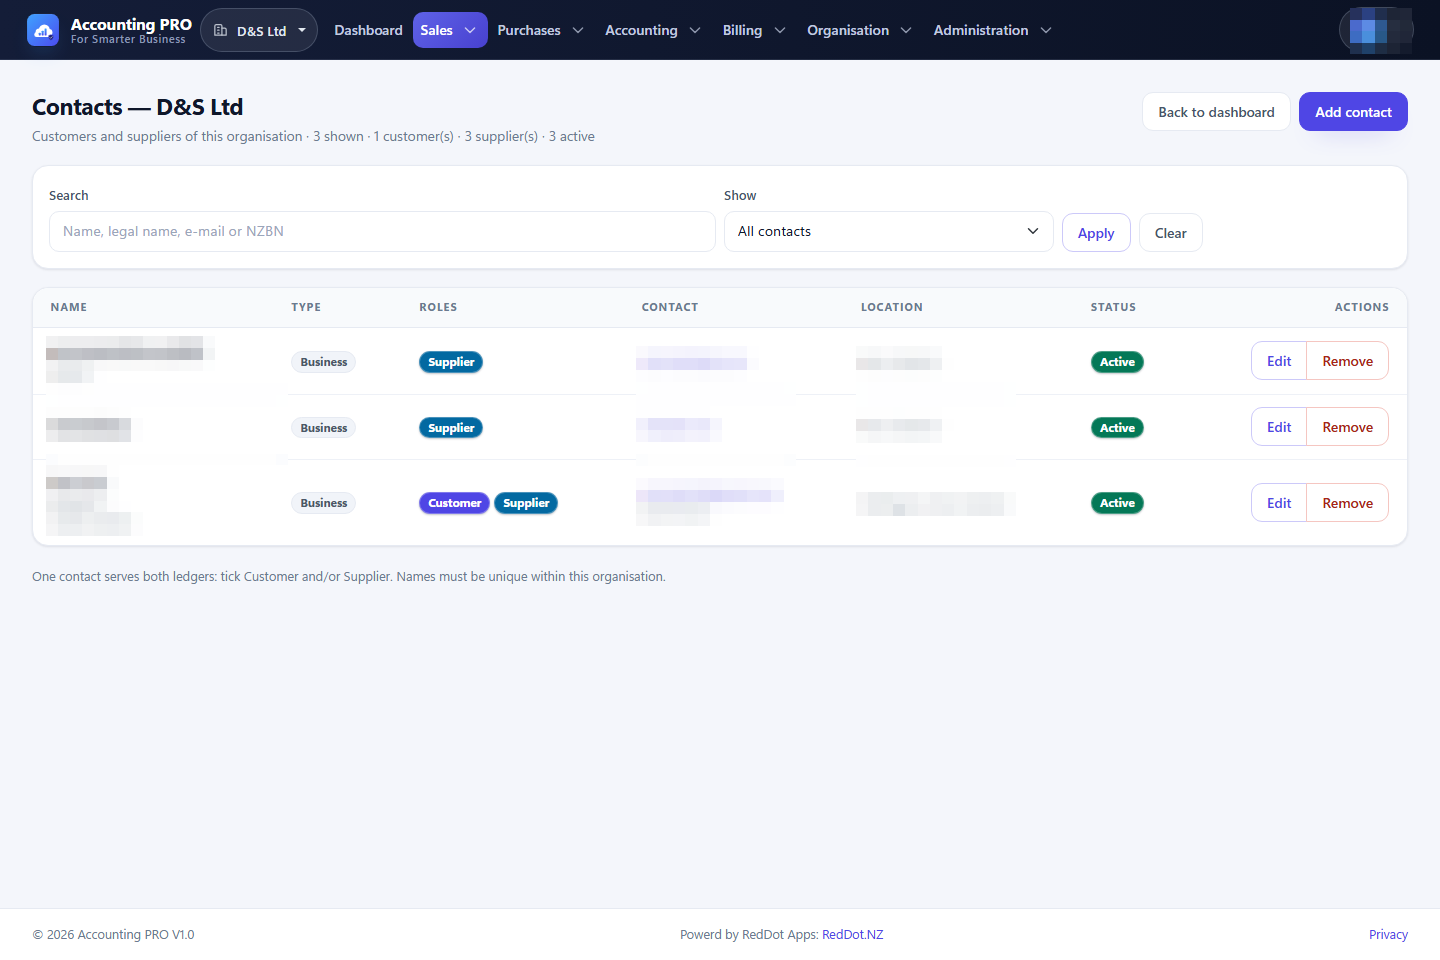
Contacts are stored in one directory. A contact may be a customer, a supplier, or both.
- Open Sales → Contacts.
- Search by name, email, NZBN or phone.
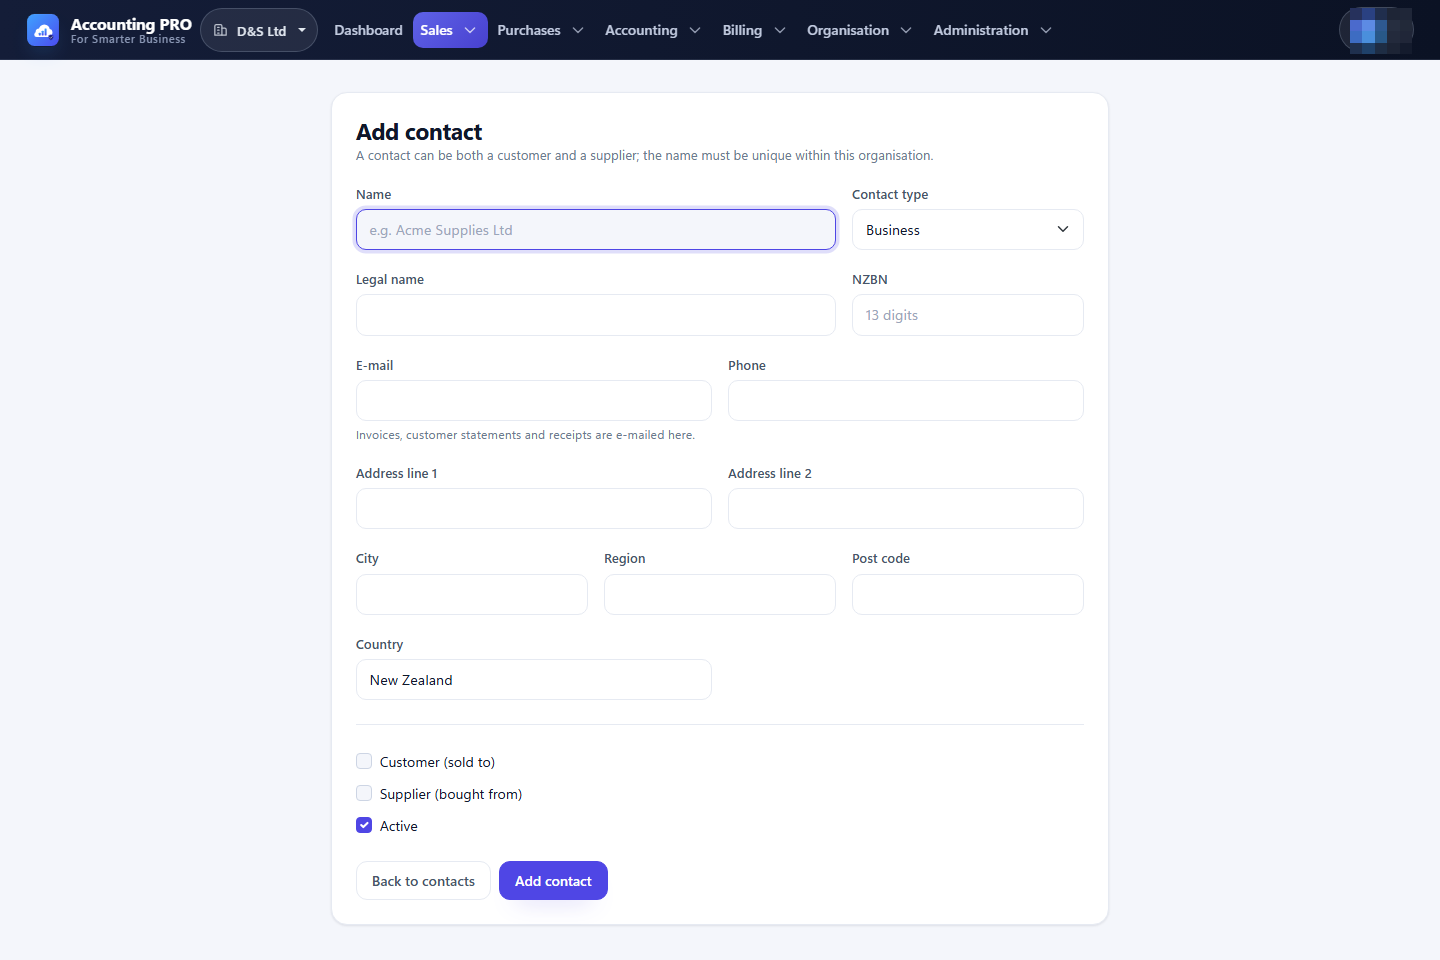
- Select a contact to edit it, or Add contact to create one.
- A contact can be marked inactive; inactive contacts remain on historical documents but are not offered on new ones.
A contact holds a display name and optional legal name, NZBN, email, phone, full postal address, country, customer and supplier flags, and an active flag.
4.2 Products and services
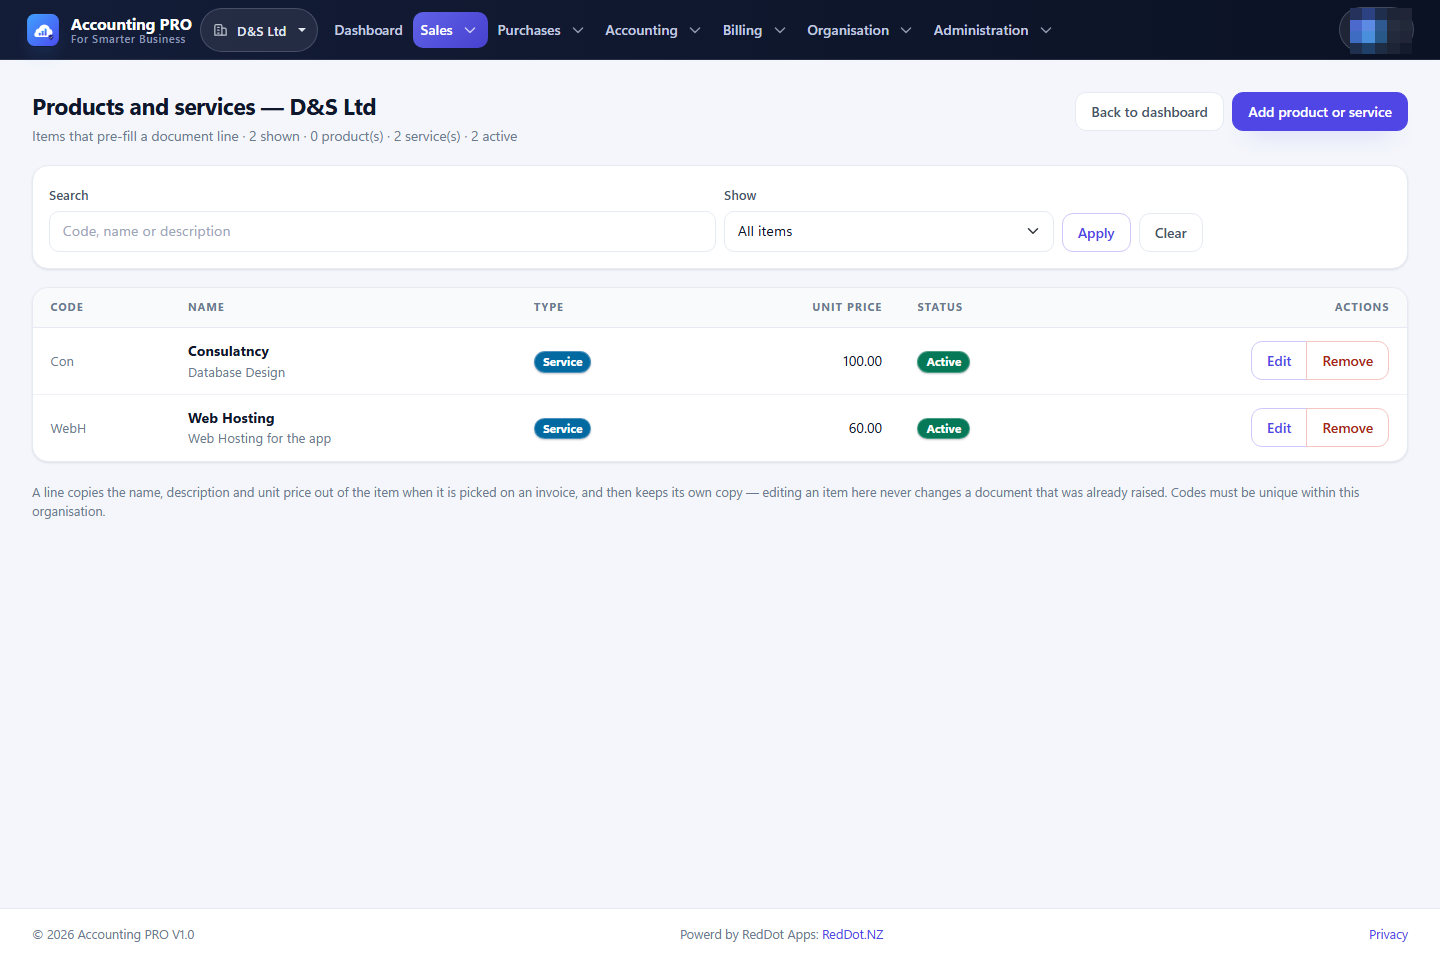
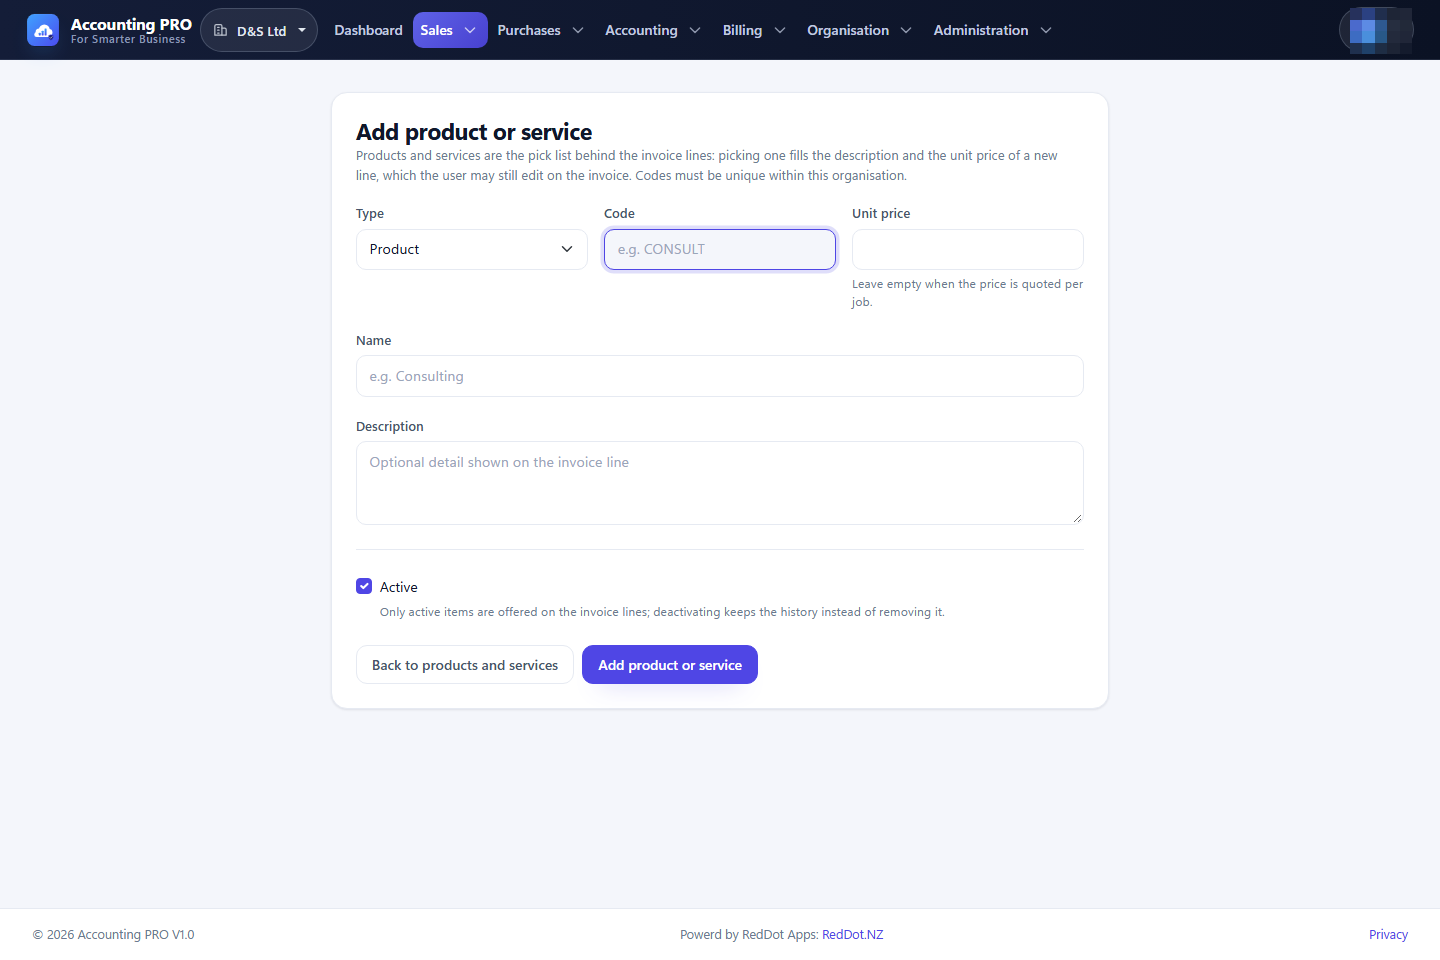
The catalogue is the pick list used by invoice lines. Each entry has a code, a name, a type (Product or Service), a description, an optional default price and an active flag.
- Open Sales → Products & services.
- Select Add product or service.
- Enter the code and name, choose the type, and optionally set a default price.
- Save. The item is now available in the invoice-line autocomplete.
Note: Products and services are a price list, not a stock system. The application does not track quantities on hand or inventory valuation.
4.3 The invoice register
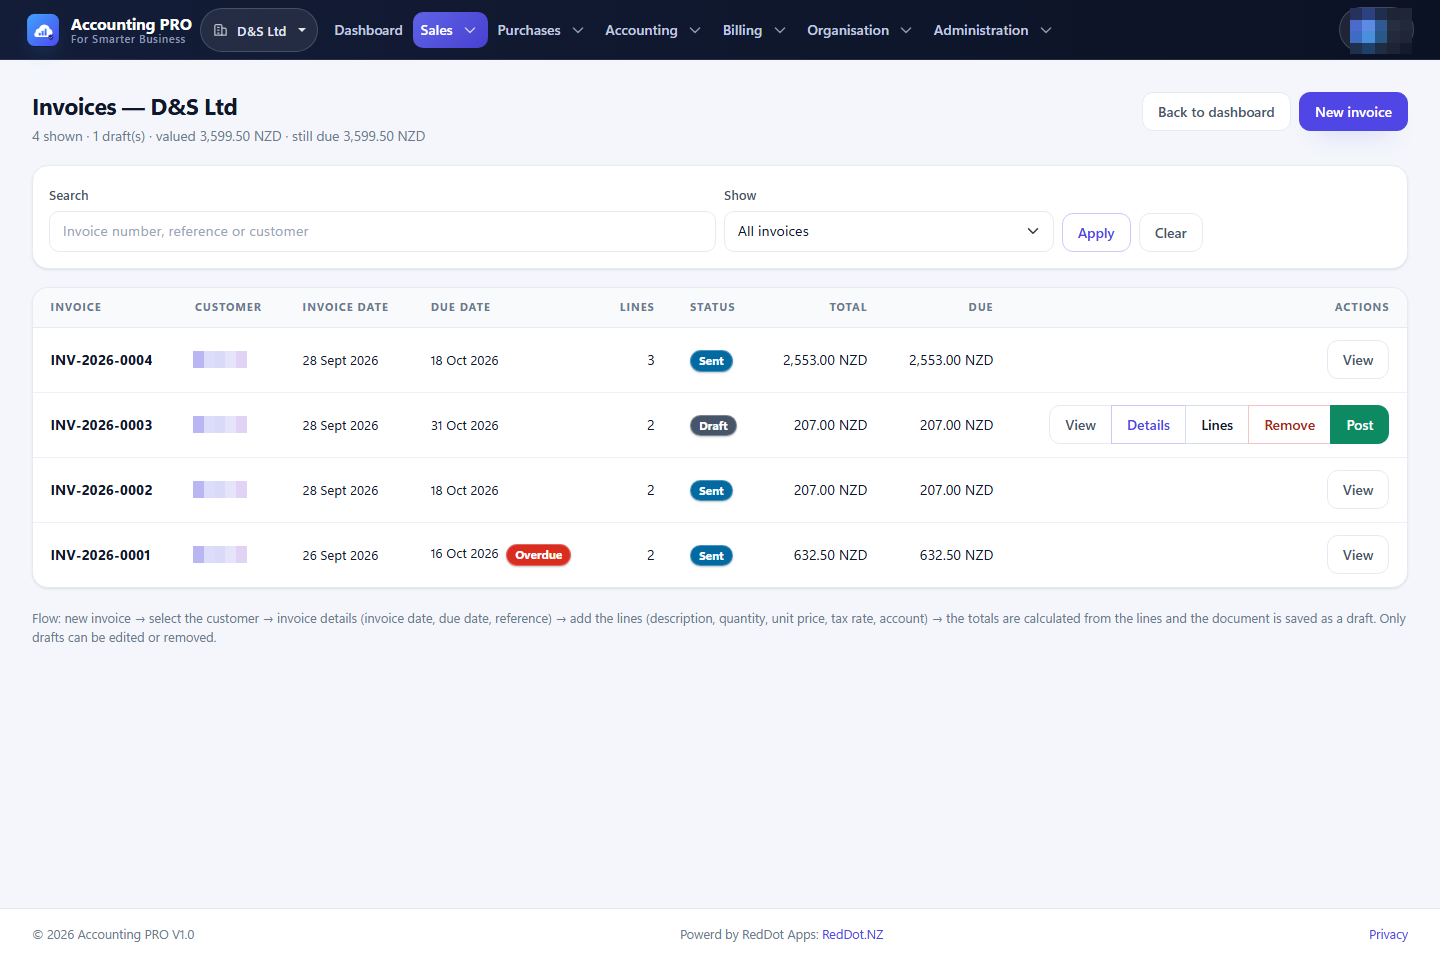
Sales → Invoices lists every invoice with its customer, invoice date, due date, line count, status, total and amount still due. The header summarises the number of invoices shown, the number of drafts, the total value and the total still due.
- Search by invoice number, reference or customer.
- Filter by All, Drafts, Open (issued), Paid or Cancelled.
- Select an invoice number to open it, or use the row actions to edit a draft, validate, post, send, duplicate or void.
4.4 Create an invoice
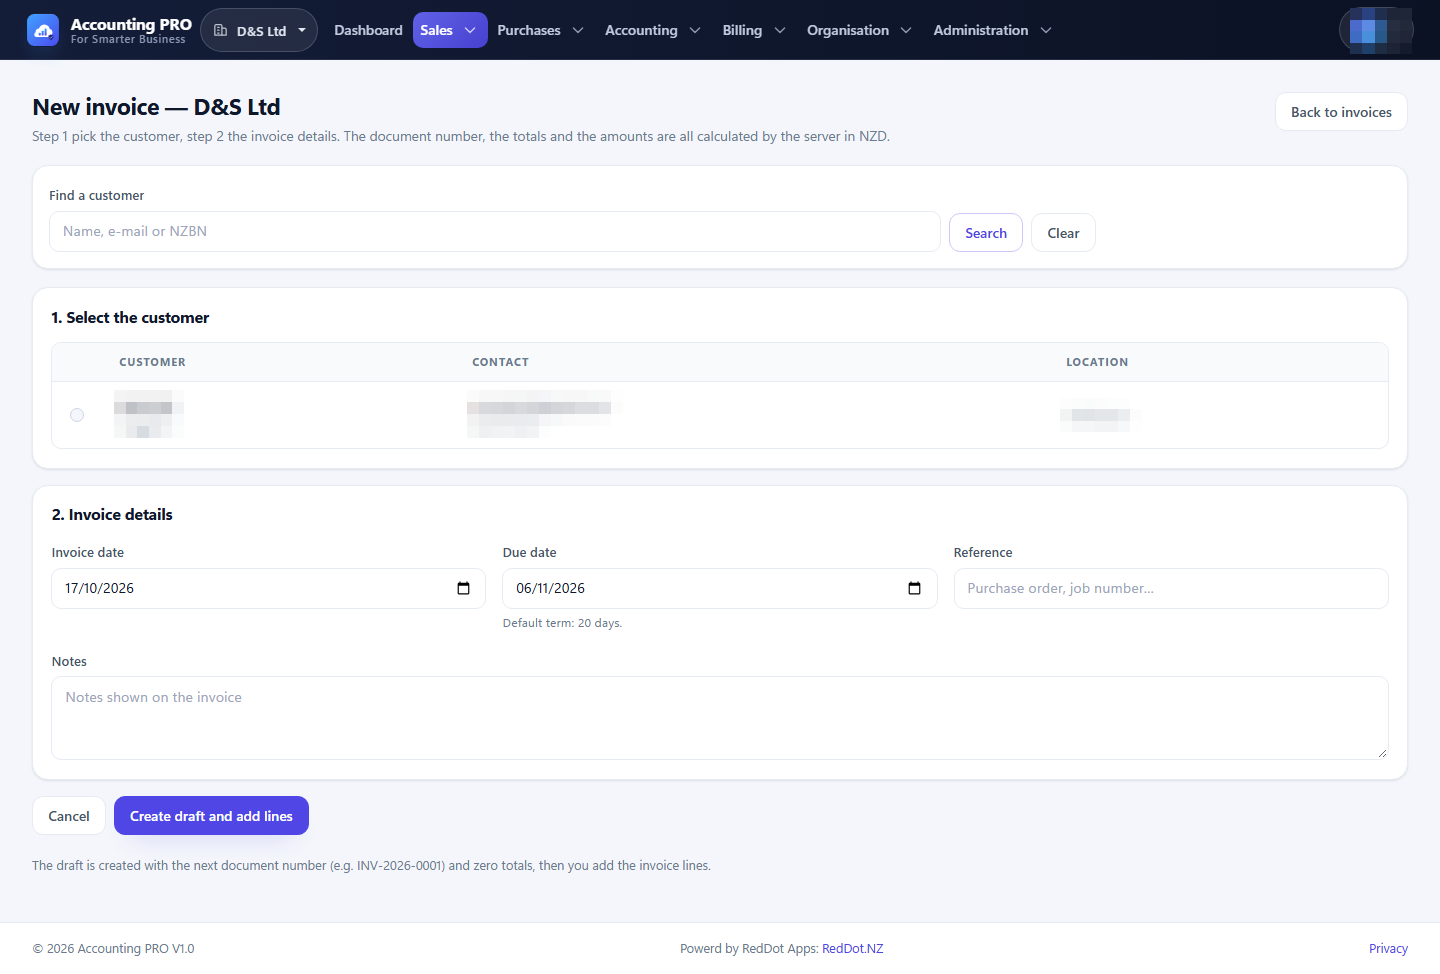
- Select New invoice.
- Choose the customer. You can search the directory by name, email or NZBN.
- Set the invoice date and due date; add an optional reference.
- Select Create draft and add lines. The server allocates the next invoice
number (for example
INV-2026-0004) and creates a draft with zero totals. The prefix, next number and sequence are the organisation's own settings (Organisation → Document numbering); a number is never reused.
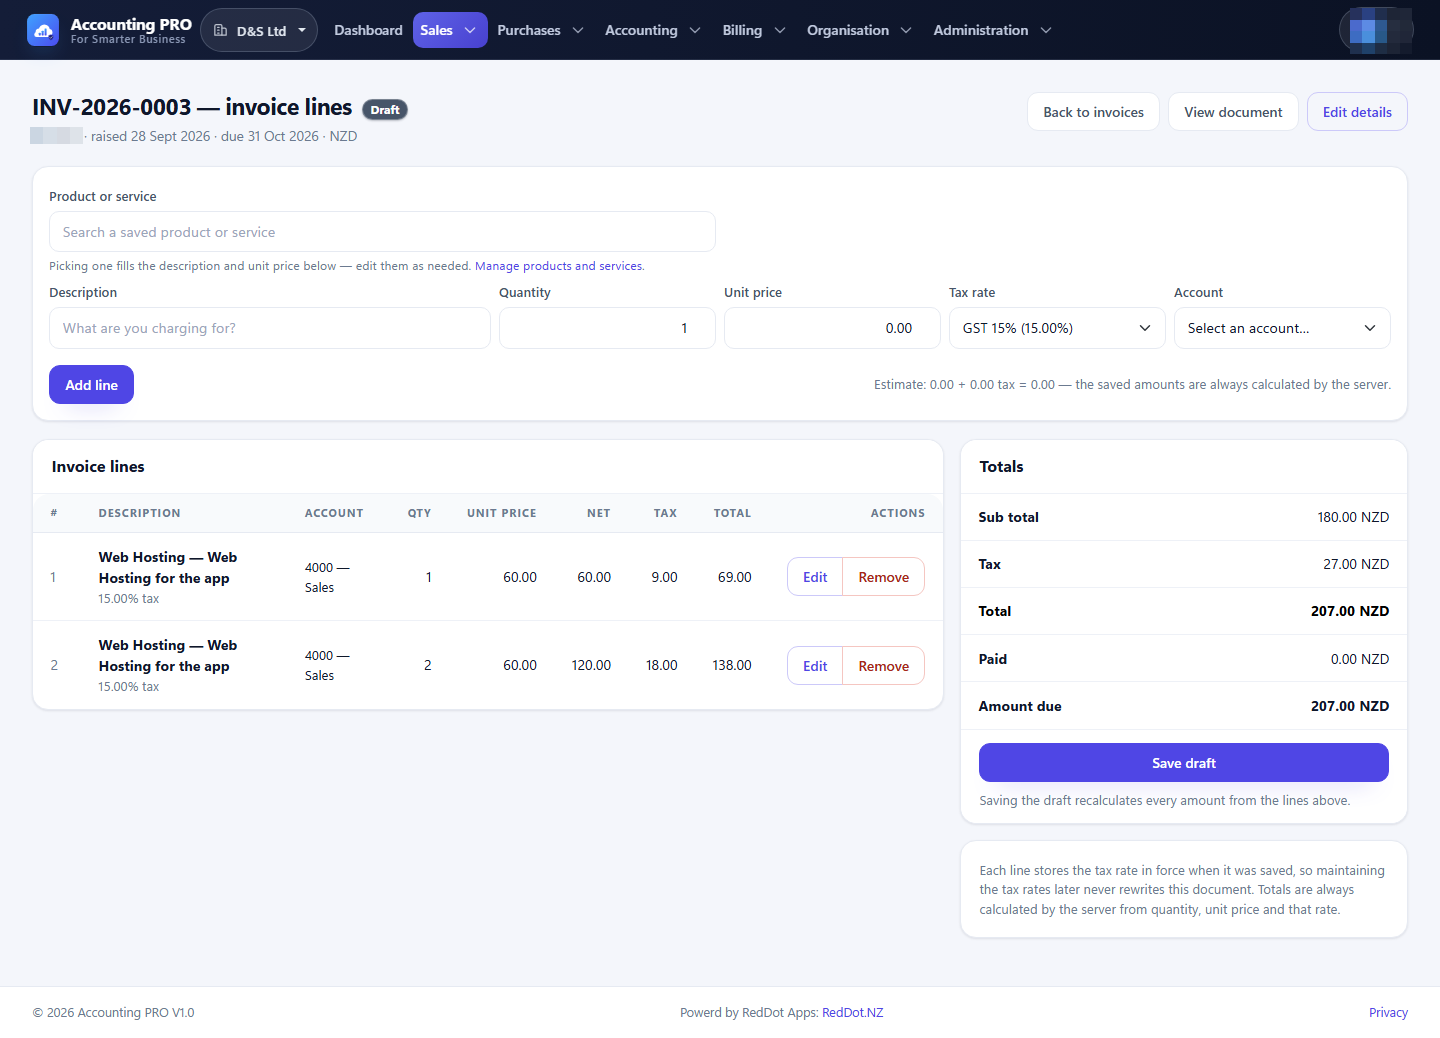
- On the lines screen, either type a description or search for a saved product or service. Picking an item fills its description, unit price, tax rate and ledger account; you can still change them.
- Enter the quantity, unit price, tax rate and account, then add or update the line. Repeat for every line.
- Remove a line with its delete action. Totals are recalculated by the server from the stored lines, in the organisation's currency.
- Select Save draft when the document is complete.
4.5 Validate and post
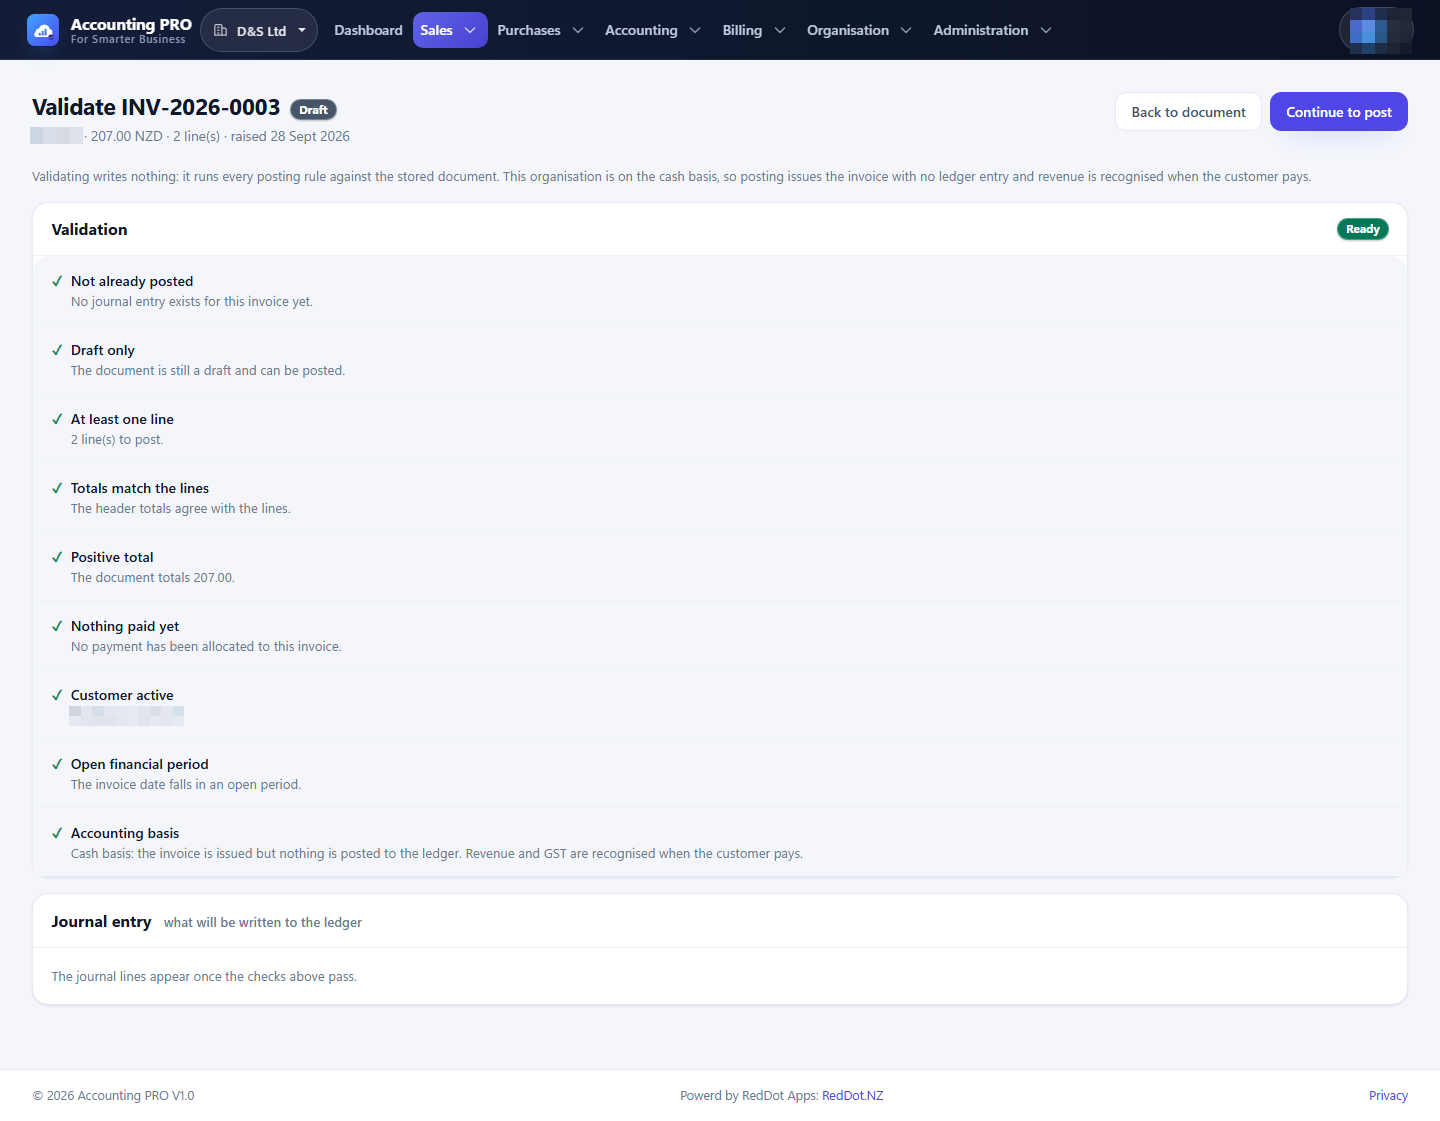
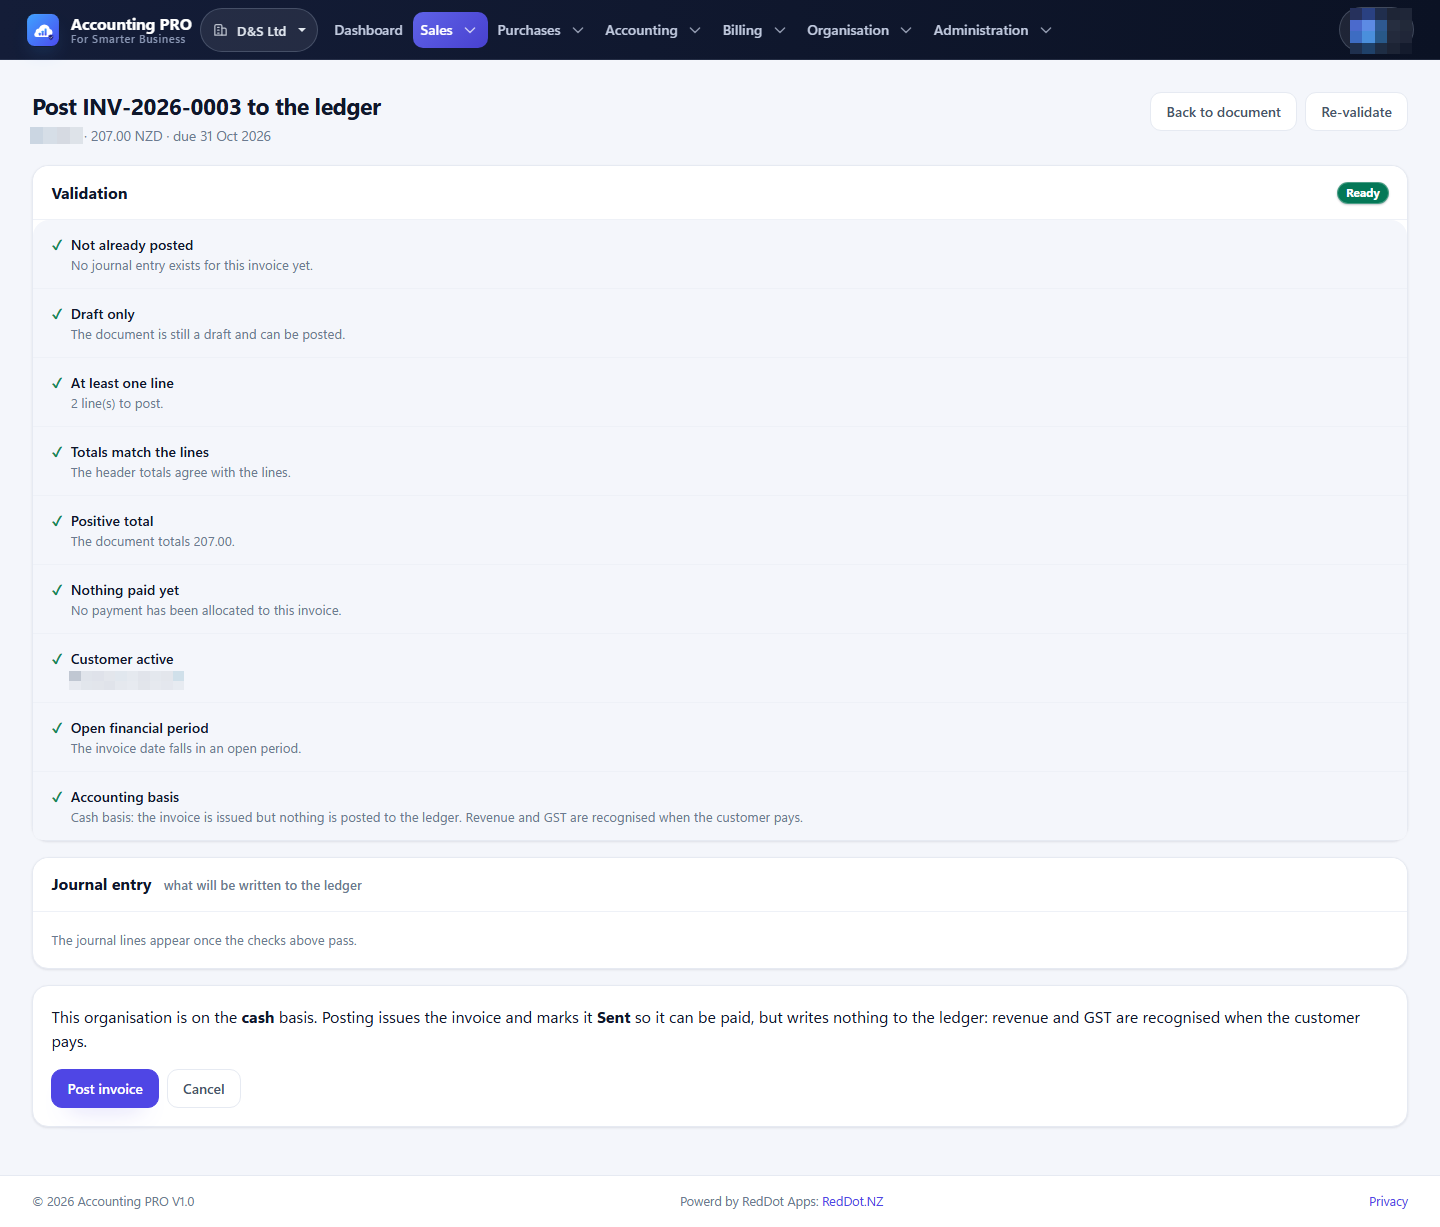
Validate is a read-only check that also previews the accounting. It verifies that the document:
- has not already been posted;
- is still a draft;
- has at least one line;
- has header totals that match the lines;
- has a positive total;
- has no payment allocated yet;
- belongs to an active customer;
- falls inside an open financial period.
On an accrual-basis organisation the screen also shows the exact journal that will be written. On a cash-basis organisation it explains that posting issues the document but does not write revenue yet.
Select Post invoice to issue the document. Posting:
- writes the journal entry (on an accrual basis);
- changes the status from Draft to Sent;
- allocates the public online-invoice token;
- records the action in the audit log.
If a check fails, the screen lists the reason and the document stays a draft.
4.6 The invoice document
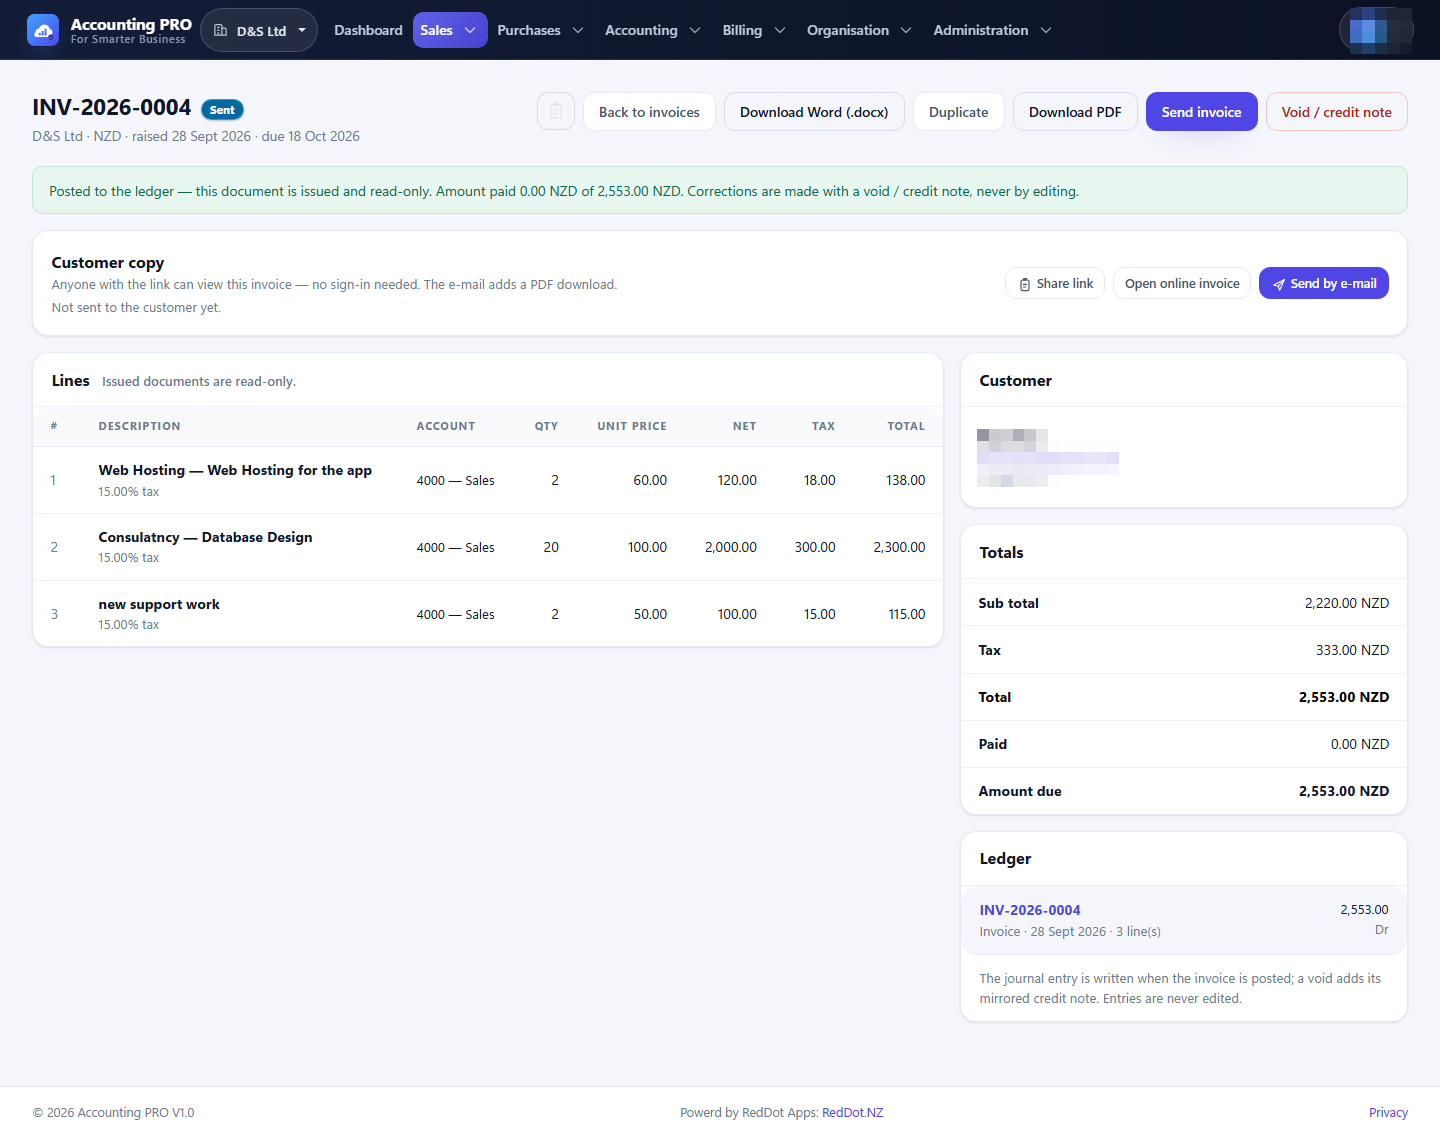
The invoice screen shows the document, its status, customer, lines, totals and ledger entry. Posted documents are read-only: the adjustment path is a credit note, not an edit.
Actions on a posted invoice:
| Action | What it does |
|---|---|
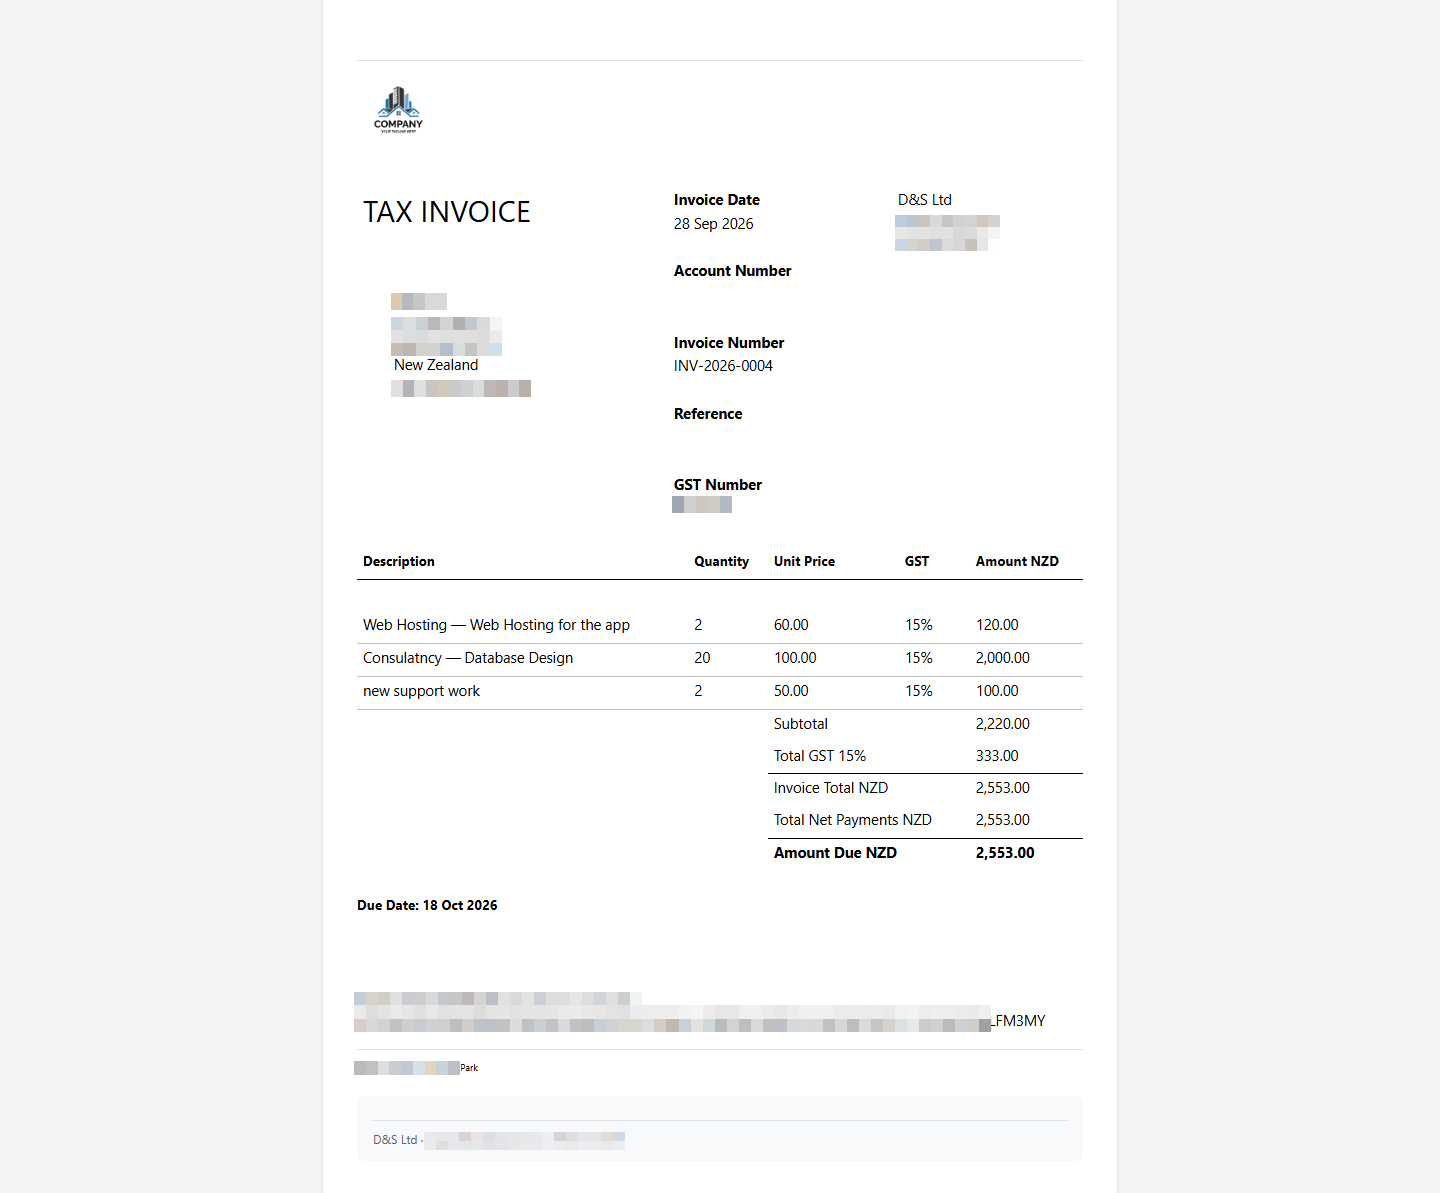
| Download PDF | Renders the customer copy through the configured HTML-to-PDF renderer. |
| Download Word (.docx) | Merges the invoice into the organisation's Word template (or the shipped template). |
| Duplicate | Creates a new draft with the same customer, lines and amounts. |
| Send invoice | Emails the customer the PDF and a link to the online copy. |
| Void / credit note | Reverses the invoice with a credit note. |
| Share link | Copies the secure public link to the online invoice. |
| Open online invoice | Opens the customer copy without signing in. |
4.7 Send an invoice by email
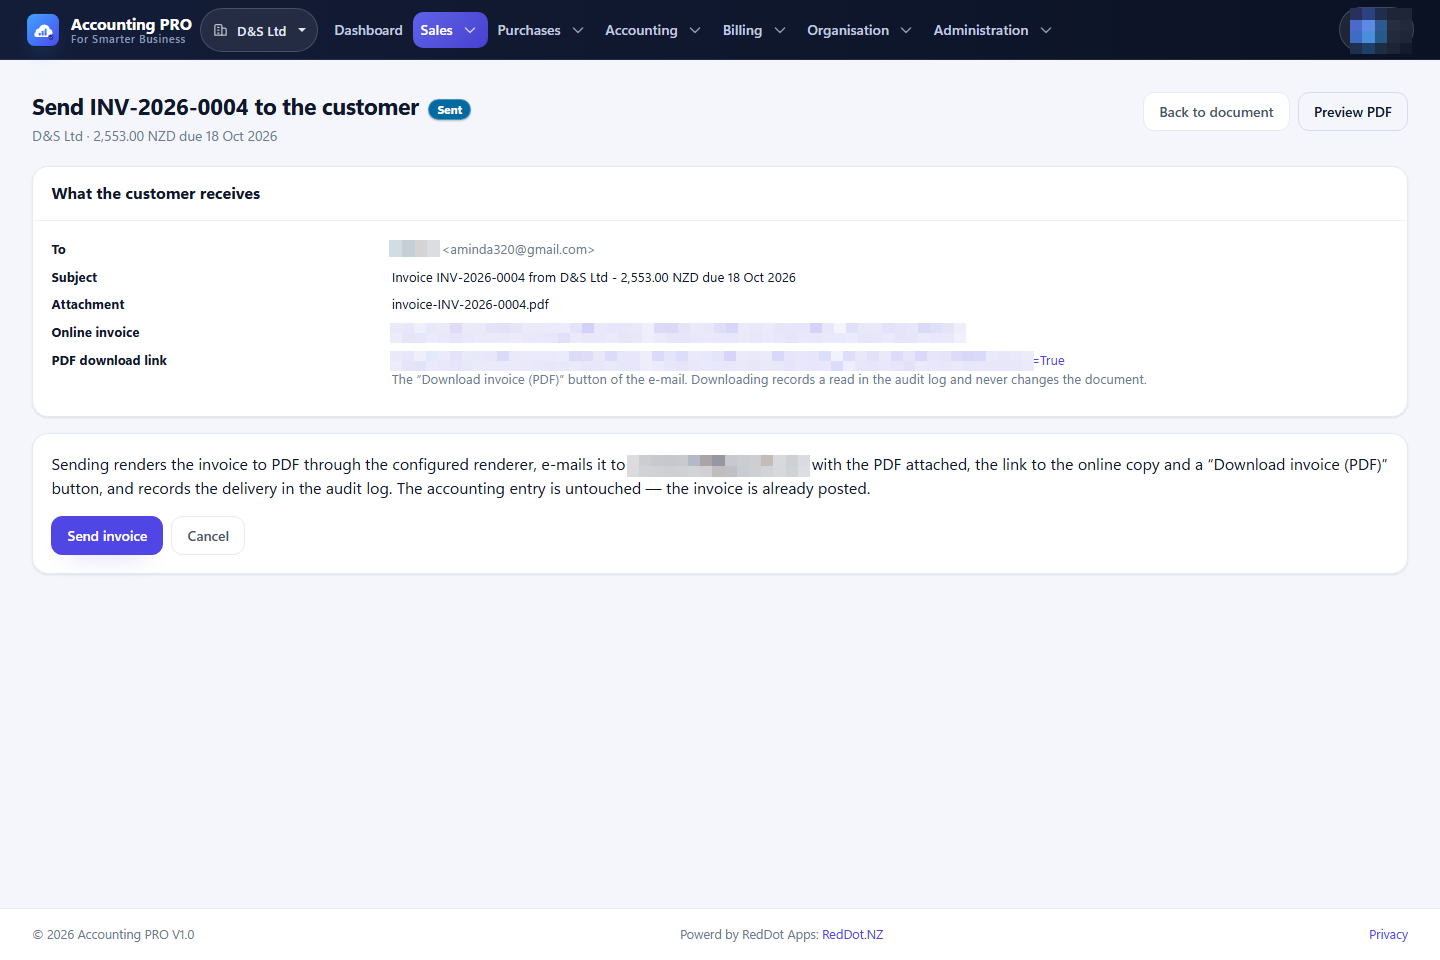
- Open the posted invoice and select Send invoice.
- Review the recipient, subject, PDF attachment name and the two links: the online copy and the PDF download.
- Select Send invoice.
The customer receives a branded email. Opening the online copy needs no account: the high-entropy token in the link is the only credential. Sending does not change the accounting; the document is already posted.
If the invoice cannot be sent, the screen names the blocker — most commonly a missing customer email address, an unposted draft or a missing PDF renderer. Delivery and views are written to the audit log.
4.8 Void an invoice
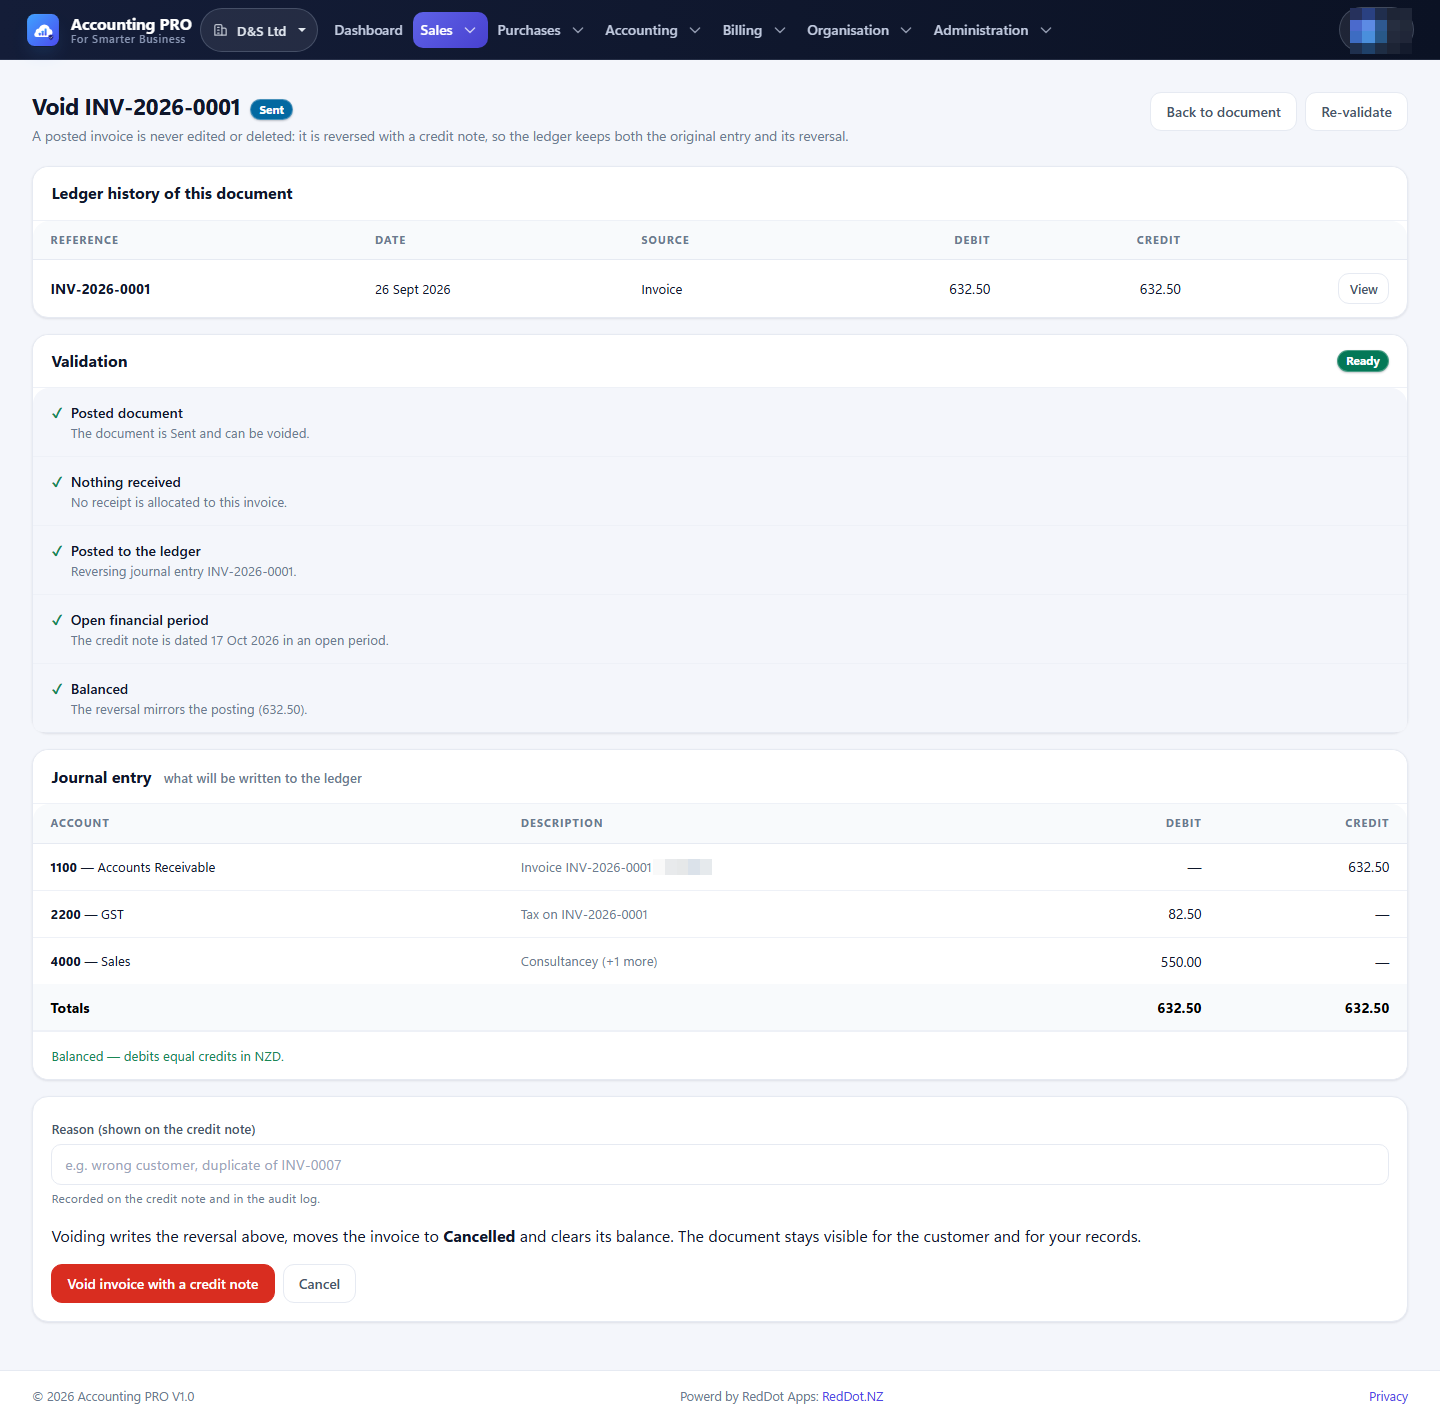
Voiding is the correction path for a posted invoice.
- Open the invoice and select Void / credit note.
- Enter a reason (up to 500 characters).
- Confirm the warning.
- The application creates a reversing credit note and journal entry and marks the invoice Cancelled.
An invoice with money allocated to it cannot be voided. Reverse the customer receipt first, then void the invoice.
4.9 Credit notes
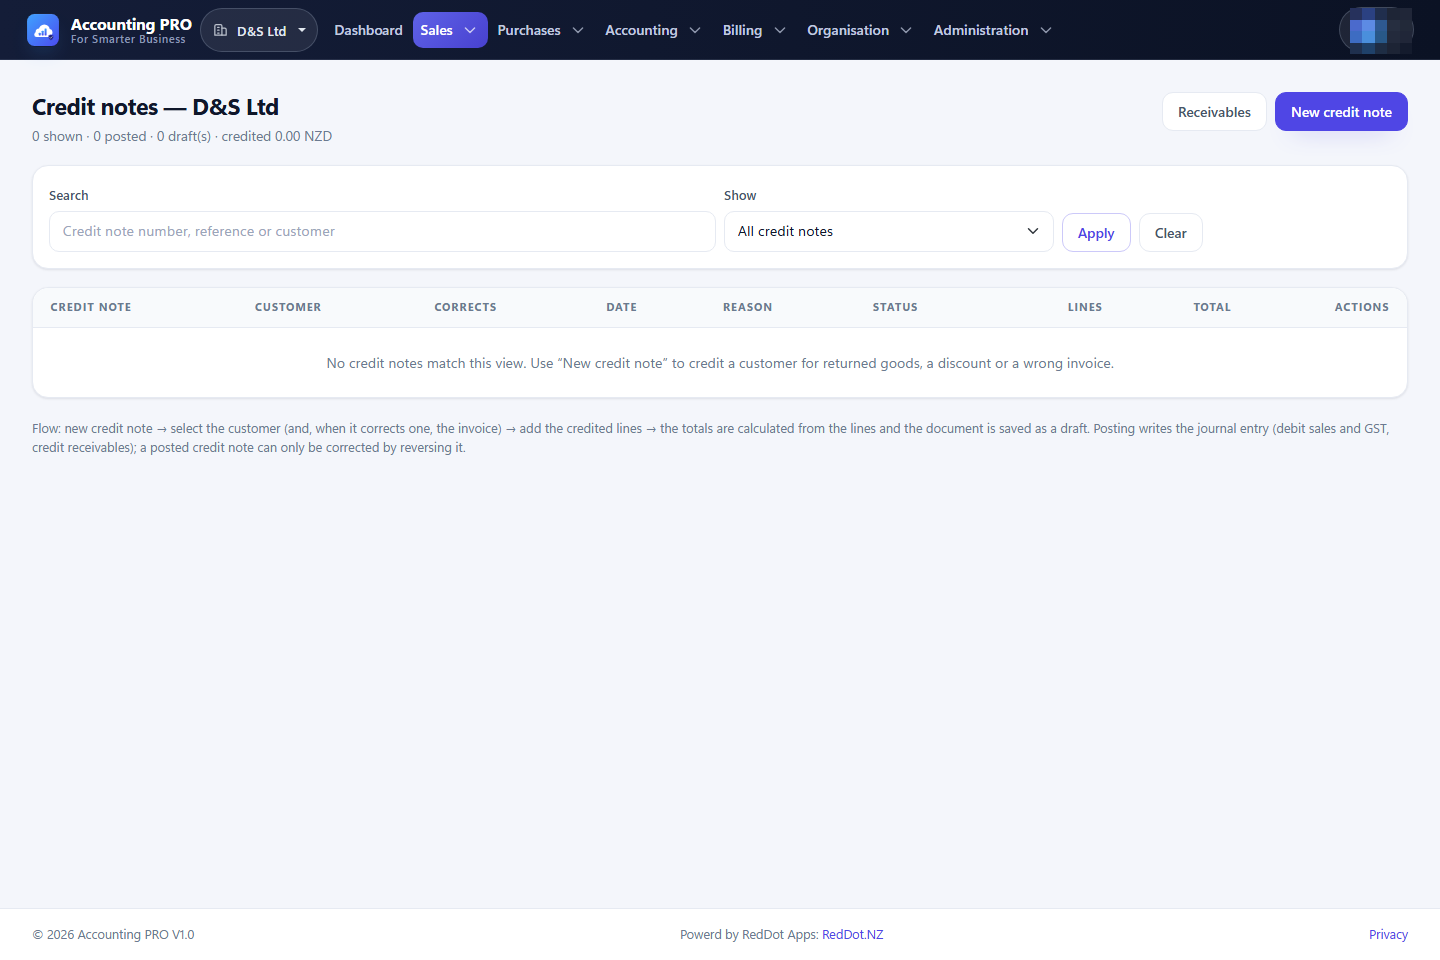
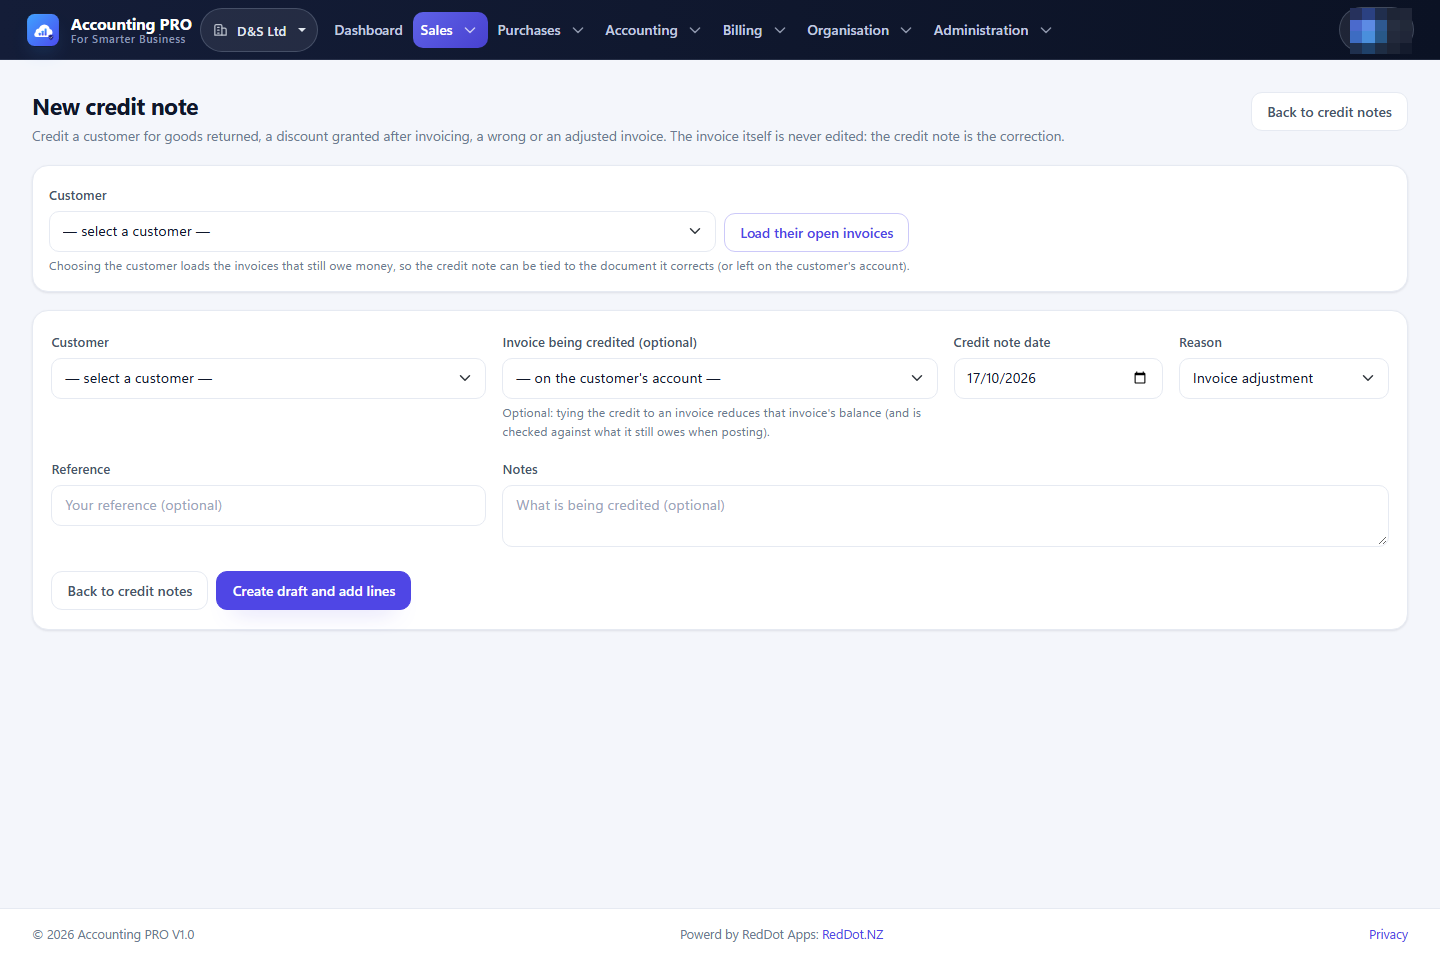
A credit note credits a customer for goods returned, a discount granted after invoicing, a wrong invoice or an adjustment. It is posted as its own journal entry; the original invoice is never edited.
- Open Sales → Credit notes.
- Select New credit note.
- Choose the customer. Use Load their open invoices to show the invoices the credit may be tied to.
- Optionally choose the invoice being credited. Without one, the credit sits on the customer's account; with one, the credit reduces that invoice's balance.
- Set the credit note date, the reason and an optional reference and notes.
- Select Create draft and add lines, then add the lines exactly as for an invoice.
- Post the credit note to issue it, or Reverse a posted one to cancel it. Reason values are: Return, Discount, Incorrect invoice, Adjustment and Other.
4.10 Customer payments (receipts)
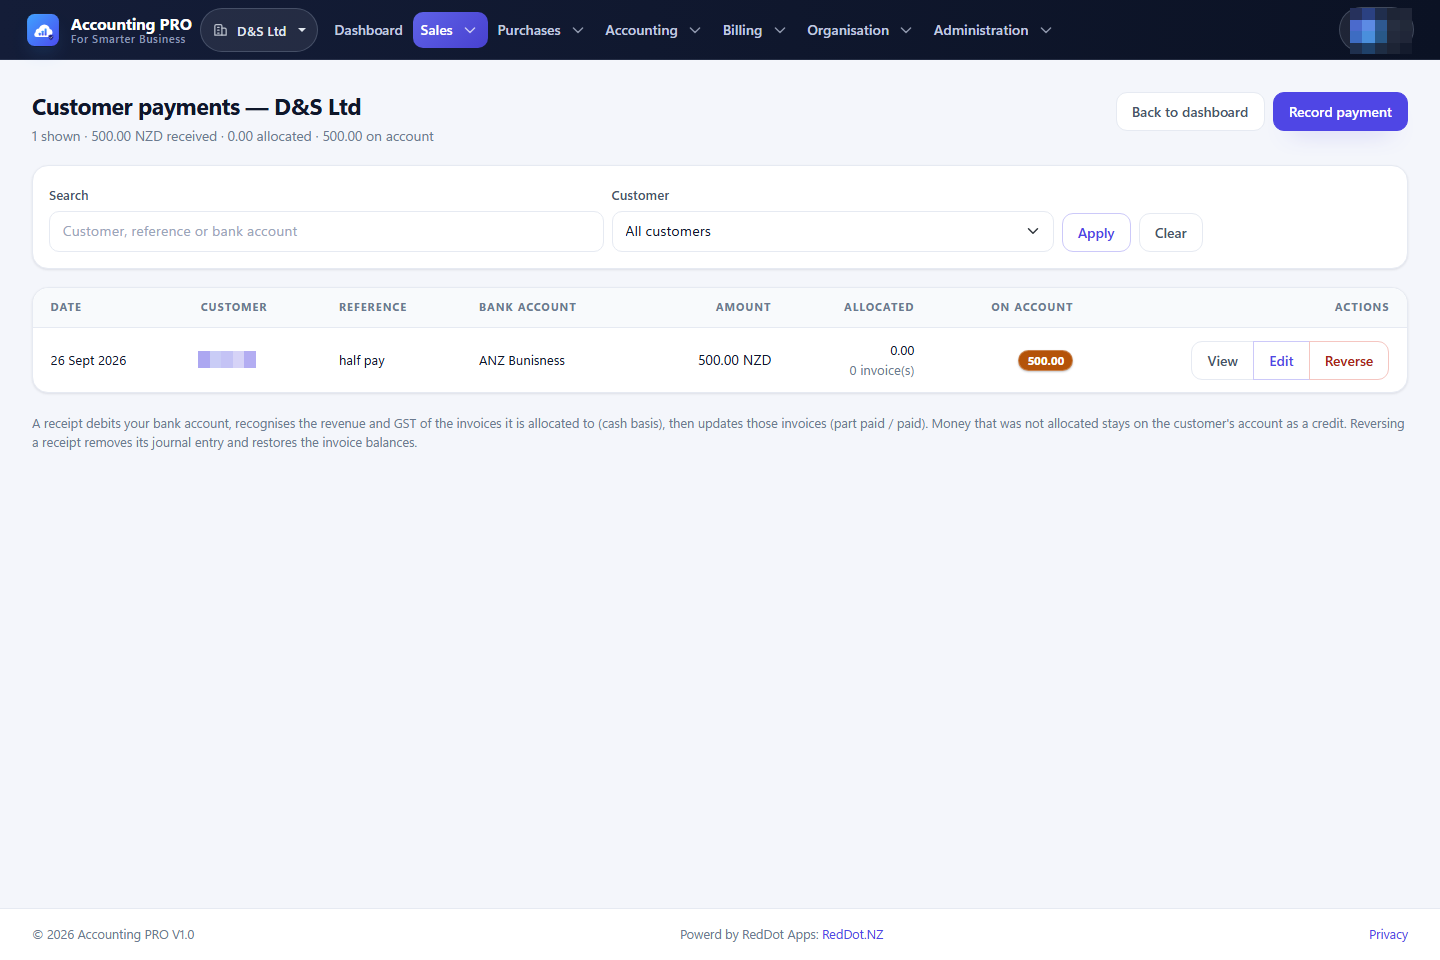
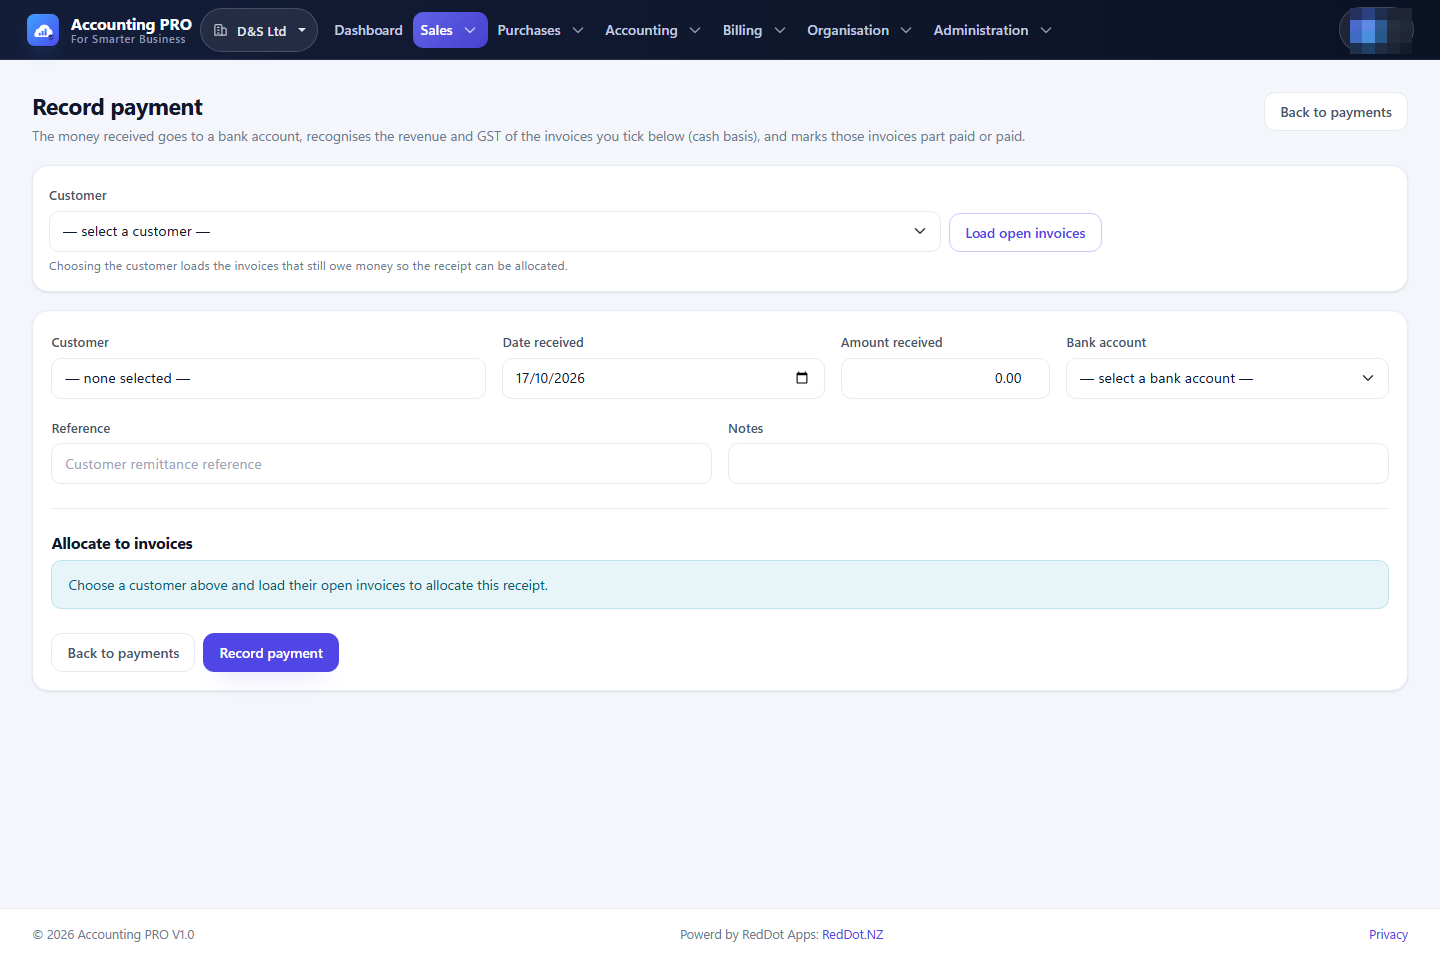
A customer payment records money received, allocates it to one or more invoices and posts the matching ledger entry.
- Open Sales → Customer payments.
- Select Record payment.
- Choose the customer and select Load open invoices.
- Enter the date received, the amount received, the bank account it was paid into, and an optional reference and notes.
- Allocate the amount across the open invoices. A payment may settle one invoice in full, several invoices, or part of one invoice.
- Select Record payment.
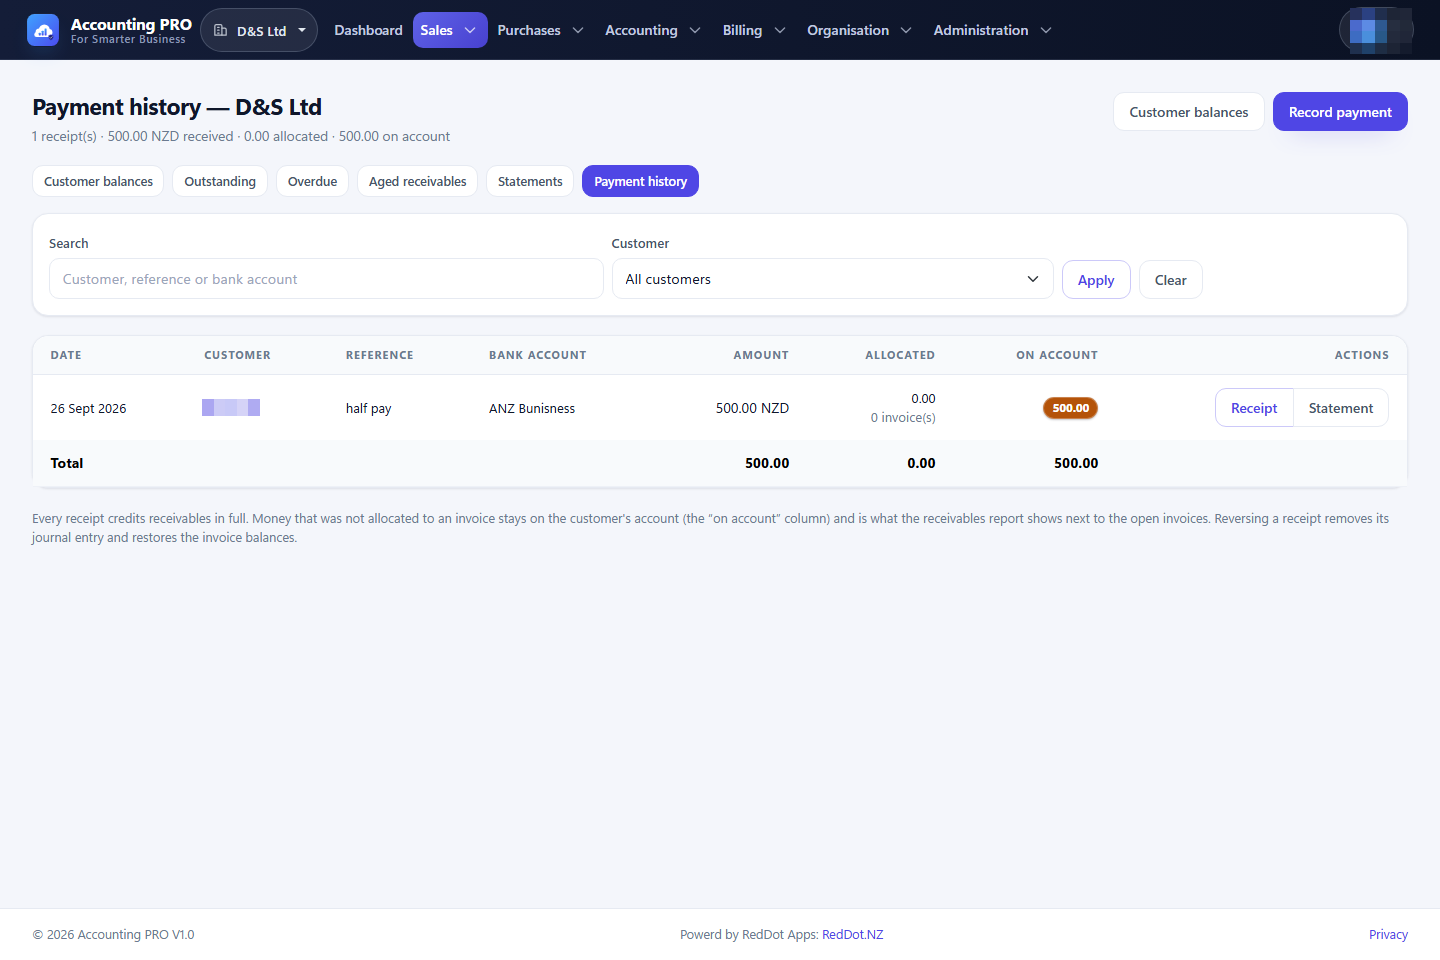
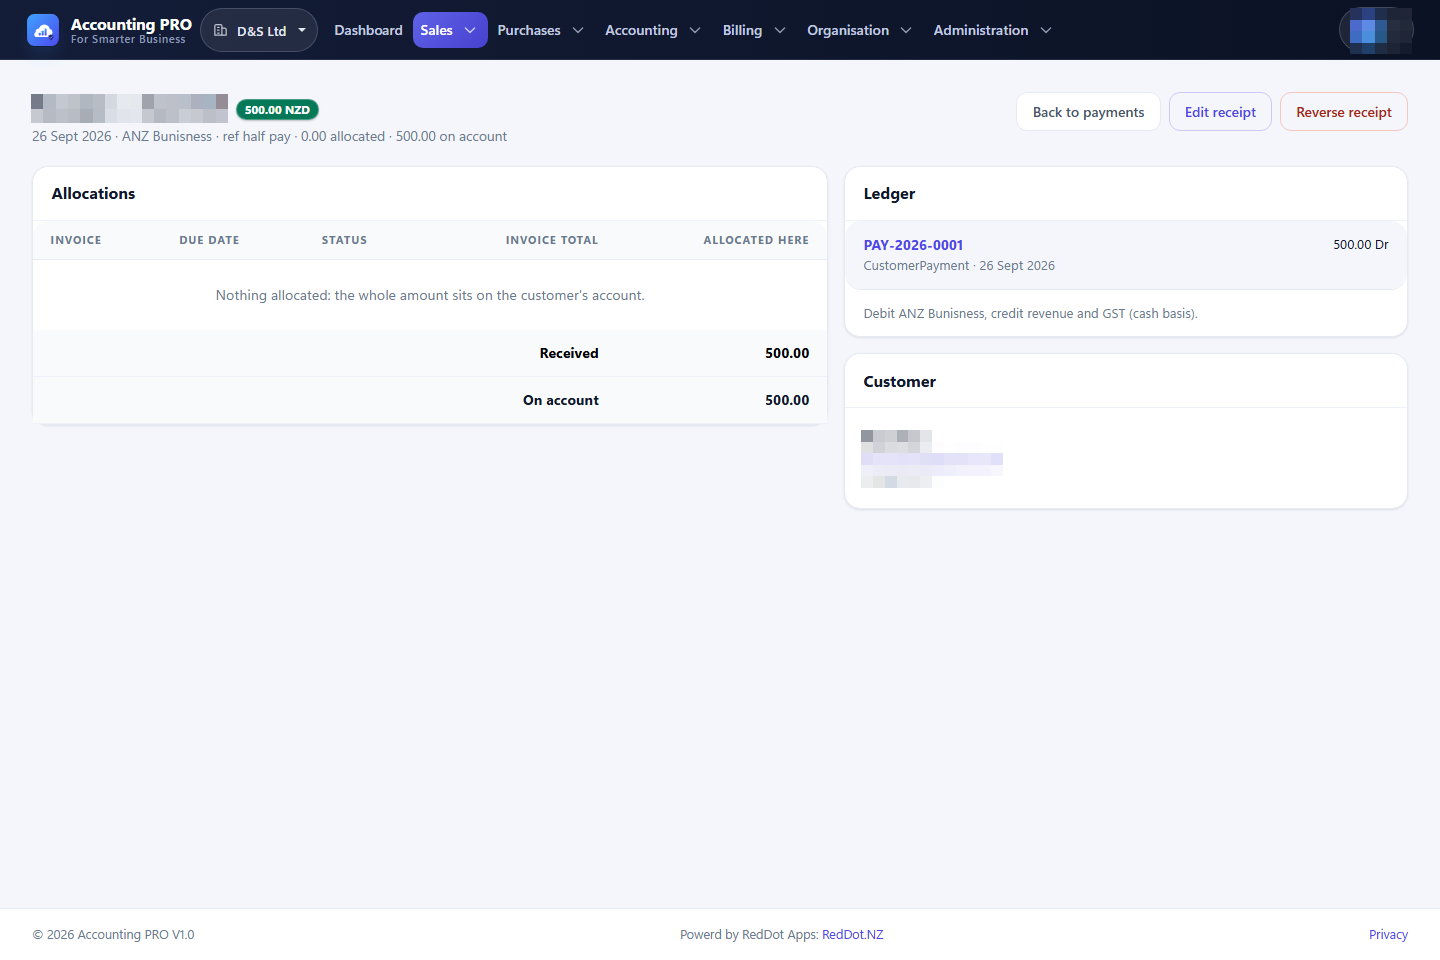
The allocated invoices move to Partially paid or Paid, and their amount due is reduced. Unallocated money remains as a credit on the customer's account.
To correct a receipt, open it and select Edit (change the date, amount, bank account, reference or allocation) or Delete. Deleting a receipt reverses its journal entry and restores the invoice balances. A posted payment is never silently removed.
4.11 Accounts receivable reporting
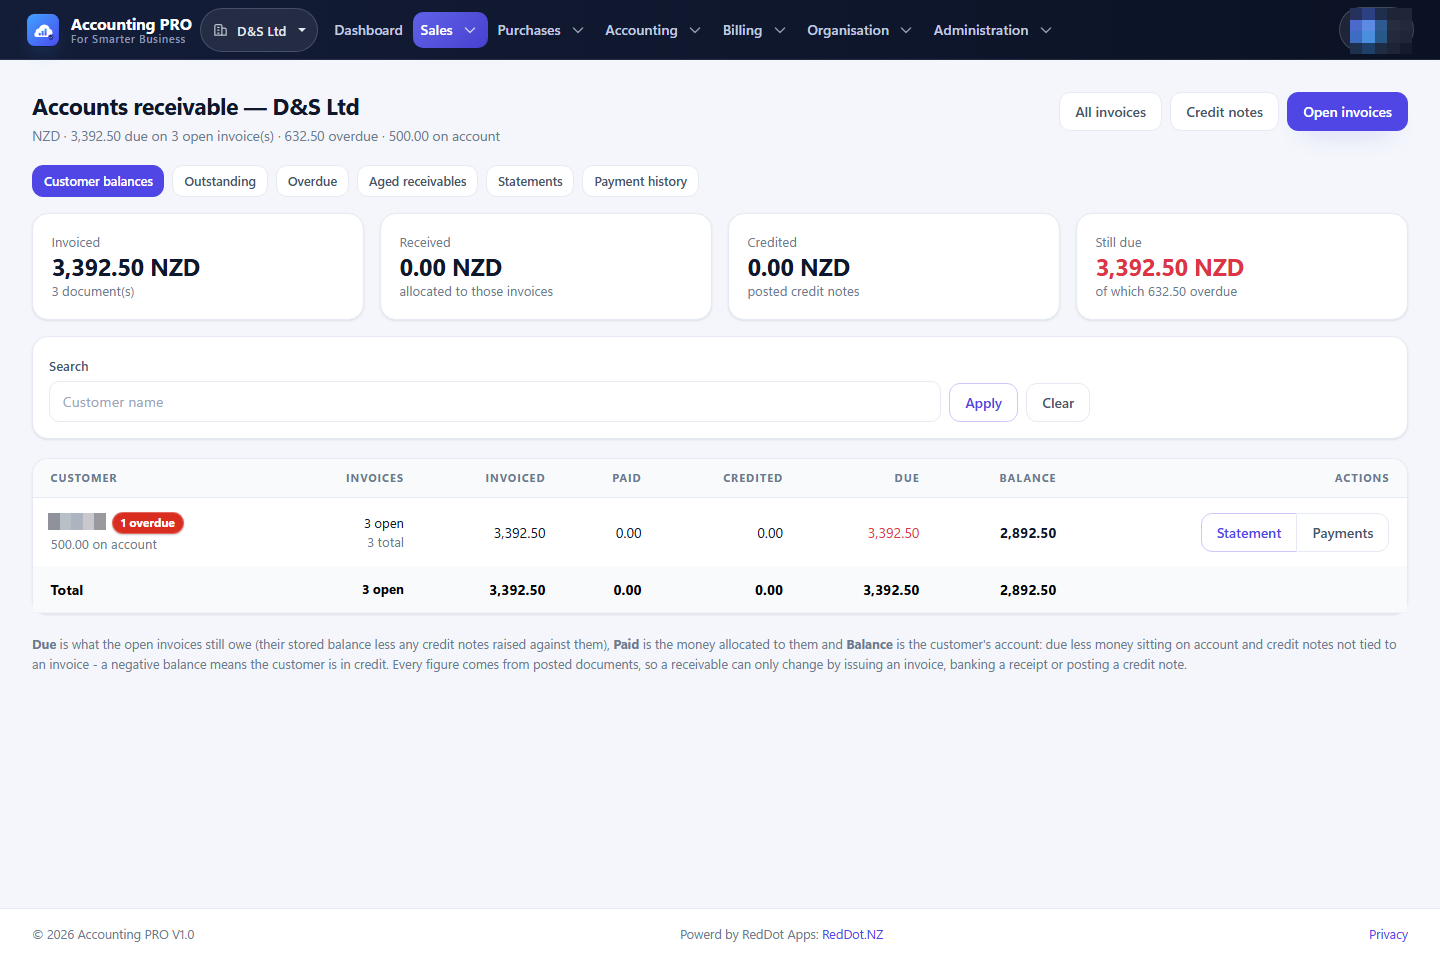
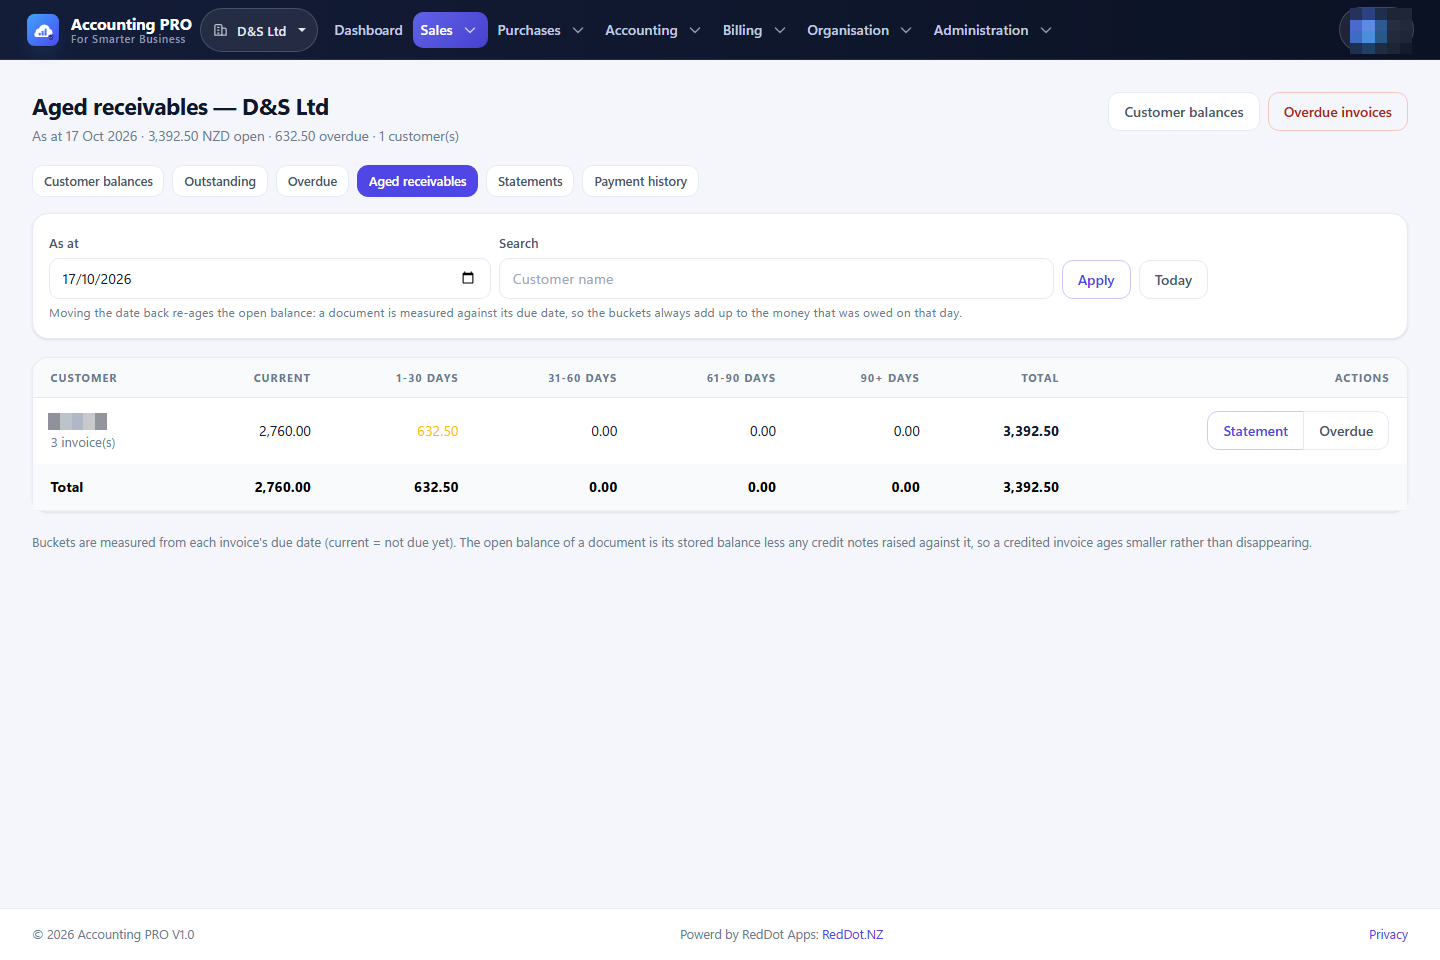
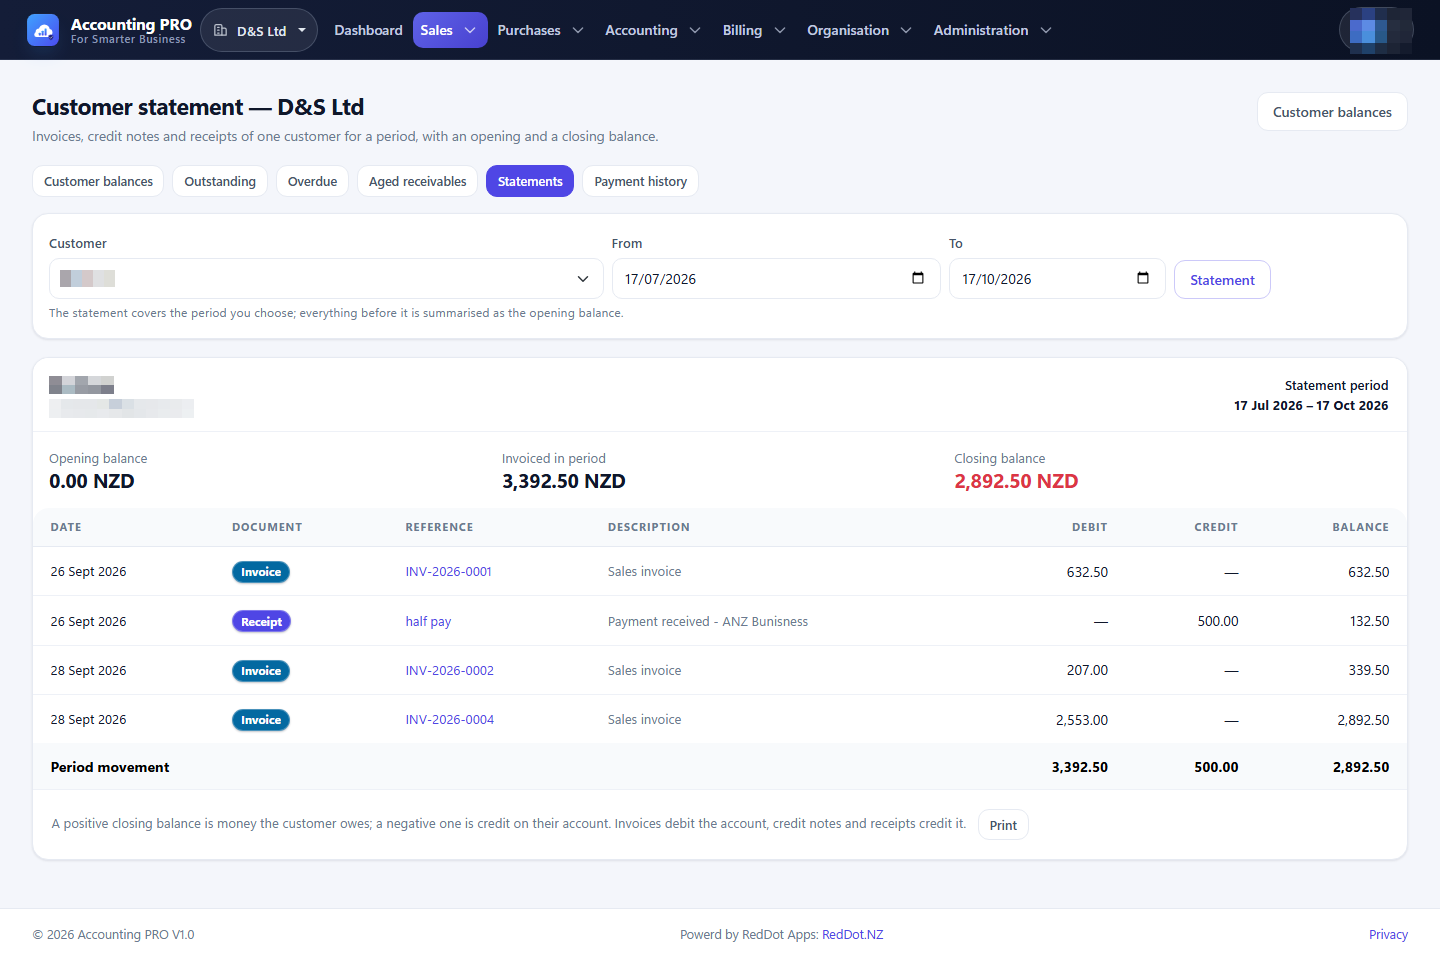
Open Sales → Receivables for the customer-position hub. The tabs are:
| Tab | Contents |
|---|---|
| Summary | One row per customer: invoiced, received, credited and still owed. |
| Outstanding | Open invoices that have reached the ledger. |
| Overdue | Open invoices past their due date. |
| All | Every invoice that has reached the ledger, including paid and cancelled documents. |
| Aged | Current, 1–30, 31–60, 61–90 and 90+ day buckets as at a chosen date. |
| Statement | A printable customer statement for a date range. |
| Payment history | Every receipt, with its allocations, for a customer or period. |
The figures are derived only from posted documents — issued invoices, customer receipts and posted credit notes — so they agree with the general ledger.